Hey guys!! I have moved my blog here:
simplicityforjulia.com
I am in the process of moving some of my favorite posts over to there so everything is in one location.
If you have a post that you particularly liked, please let me know and I"ll be sure to move it over.
Thanks!!
Friday, May 16, 2014
Sunday, May 11, 2014
Make Your Own Watering Bulb
Recently, my mom bought me several plants for my birthday. Two of these plants are Stevia, the natural herbal sweetener. Stevia is hardy until 10 degrees F. Temperatures any lower than that will kill the plant. So I potted it. My two stevia plants are living on my front porch. I will bring them in when the weather becomes cold.
Chances are, as Spring turns to Summer, I may forget to water these awesome herbs. So I thought a watering bulb would be a good idea. You fill it with water, turn it upside down and it provides your potted plants a continuous amount of water. The set it and forget it of plant care.
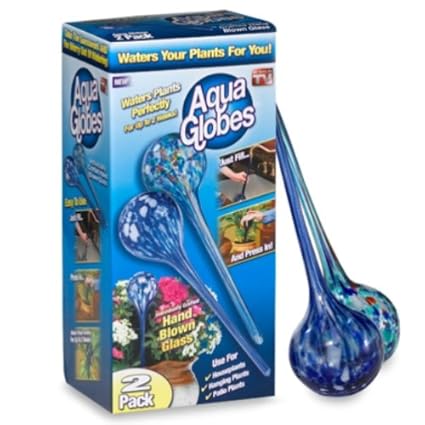
While I appreciate the ingenuity of this product, I don't spend money on things like that. I will, however, steal their general idea. I used something we happened to have around the house: a beer bottle. I filled the beer bottle up with water, and sunk the neck into the dirt of the Stevia's pot.

If you have bigger pots, a wine bottle would also work for this. I'm sure you could set these up in the garden, but that seems like a lot of work and maintenance and not really worth it.
Chances are, as Spring turns to Summer, I may forget to water these awesome herbs. So I thought a watering bulb would be a good idea. You fill it with water, turn it upside down and it provides your potted plants a continuous amount of water. The set it and forget it of plant care.
While I appreciate the ingenuity of this product, I don't spend money on things like that. I will, however, steal their general idea. I used something we happened to have around the house: a beer bottle. I filled the beer bottle up with water, and sunk the neck into the dirt of the Stevia's pot.
If you have bigger pots, a wine bottle would also work for this. I'm sure you could set these up in the garden, but that seems like a lot of work and maintenance and not really worth it.
Wednesday, May 7, 2014
How to Cloth Diaper (including care of diapers)
1) Preparing New Prefolds:
So you just got your diapers in the mail! You got prefolds and they are brand new!! How exciting! First things first, you must wash them so they are ready to go for your baby.This is really simple.
Put all of your new diapers in your washing machine and set your washing machine on the HOT cycle. Add Soap, about a quarter cup. Anything with no scents or dyes should work. Let your washing machine run through this cycle. Run another Hot cycle. Do this another 3 times so that you have run a total of 5 hot cycles, only using soap for the first cycle. After this is done, throw them in the dryer. They can be dried on a really hot setting. Now check to see if they absorb water. I dripped some water from the sink onto the cleaned diapers to test. If the diapers didn't absorb the water, I put them back in the washer for some more soap and hot cycles. Make sure you get all of the soap out.
Note: in order to prepare your all-in-ones or pockets, just wash them once and you are good to go. I would use a hot cycle but do not put them in a super hot dryer.
2) Cloth diapering your baby:
One of the more valuable things I did was practice cloth diapering on a stuffed animal. That being said, I will walk you step-by-step through the diapering process with prefolds. Flats are more like an origami project and too much work and pockets are self-explanatory.
Meet my beloved bunny. He has been with me since for over 20 years. I've used him for snuggles and I used him to learn to cloth diaper. He sits still and is very patient.

There are many ways to fold a cloth diaper, but they all always ended up looking the same to me.
If your diaper is a little large, fold it in the back:

Lay you lovely baby (or stuffed bunny) on the diaper. Please note the fold in the back of the diaper. This may help to keep poo in:

Fold each side in at the bottom to form a triangle:. Some people like to roll the sides in, this is called the jelly roll technique. I find this is exactly the same and my diaper looks the same either way I do this. Please note there are some other methods for folding the diaper, but I don't like them, so I won't cover them here.

Bring the front of the diaper up to around your baby's belly button:

Now, use that awesome Snappi. Fasten it on one side:

Pull across and attach it to the other side of the diaper:

Now it's time to add the cover. Place the cover under you child:

And pull this up through their legs and use the fastening system (whether it is velcro or snaps):

Look for any places on your child where the prefold may be poking out past the diaper cover:

Poke that back into the diaper cover:

Admire your beautiful baby (or stuffed bunny) in their cloth diaper:

3) Caring for soiled diapers
Go into the bathroom and run your cloth wipe under warm water. If you think it may be a stinky, yucky mess, bring two wipes. Lay your baby down and open up the diaper. If it is wet, and your cover is still dry, toss your prefold into the wet bag, wipe your little one's hiney down, toss your wipe into the wet bag, put some coconut oil on any sore areas, and put on a new prefold diaper. Do not sticky or thick diaper cream. This will seal you cloth diapers and make them not work. If you do accidentally use some, just strip your diapers as described below. Feel free to re-use your cover as long as it is clean and dry.
If there is poop in the diaper, you get to use that handy sprayer. Clip your dirty diaper to the top of your bucket (which is already on top of you toilet). Use your imagination here, as I didn't think anyone wanted to see actual poop.


Let the diaper drip the excess water out, and go about your life for a bit. (pretend the diaper is dripping wet here, also notice our lack of poop)

When you come back, put your rinsed diaper in the wet bag. This may seem yucky, but all human waste (poop) is supposed to be flushed down toilets and not thrown into the trash, by law. I don't think anyone who uses disposables does that, just an interesting fact.
When away from home, you sometimes must put the fully loaded (poopy) diaper directly in your wet bag. Rinse the diaper when you get home. There may be a bit of foul smell, but the smell is rather minimal.
Once you are ready to wash your diapers, empty the wet bag in to the washer and then add your wet bag (that way you have a clean wet bag, too). Run your diapers through a cold rinse. Add your detergent, less is more here. We really want to avoid any soap build up. This build up can irritate baby's bottom and will cause the diaper to become less absorbent. I use about 2 Tablespoons of detergent for a medium to large load of diapers. Run your soaped diapers through a full hot cycle. Make sure your water is very hot. We are not trying to conserve energy in this arena. After that, add about a quarter cup of white vinegar and rinse your diapers through the cold rinse cycle. The vinegar acts as fabric softener and adds no smell. Finally, we hang our diapers up to dry either outside or inside on racks. Depending on time and space, you may find it better to use the dryer. Please do not use dryer sheets. You won't have any problems with static or softness if you use that white vinegar.
When you wash your diapers, feel free to include any baby clothing, bibs, or wipes. The hot water sterilizes everything, and the detergent is super friendly on baby's skin. Also, you may already have clothing that has some diaper mess from baby on it.
Very interestingly, we don't have any poo stains on any of our diapers. This may be because we hang them out to dry and the sun bleaches them or simply because poo is very washable. I don't know.
4) How to strip diapers
You will know when it is time to strip diapers. They will not absorb as well as they once did, and after only being slightly wet, they will have a strong pee smell. Stripping your diapers is very similar to what you do to prepare them the first time. My guess is that we do this anywhere from once a month to once every 5 months depending on when the diapers need it.
Take all of your stinky diapers and put them through a cold rinse. Now add 1 tablespoon of blue Dawn Detergent and a over a quarter cup of bleach. I fill the pictured cup up to the number 3 with bleach. I'm sure you may be able to use other dish detergents, but everything I have read (and what I have always done) uses blue Dawn. If you try a different detergent, let me know about it in the comments section.

Run this through the hot cycle over and over and over again until there are NO suds. If there are suds, your baby's hiney will not be happy.
That in a nutshell is how I cloth diaper. As simple as I know. Hopefully not too much information, not too little. If you have any questions, please let me know and I will answer them to the best of my ability.
Friday, May 2, 2014
Possum Living - A Book Review

Dolly Freed wrote Possum Living in the 1970s when she was a young woman. The book details her adolescent life where she and her father used almost no money. They survived on the food they caught and grew. Surprisingly, she and her father were able to do this while living in suburbia on a very small plot of land. They were able to keep up the appearance of relative normalcy to the outside world while keeping up a high and enjoyable standard of living. This book is equal parts "how-to" and story telling with a bit of Philosophy included.
There were a lot of great tips and thoughts from the book such as: Buying your grain whole sale from a feed mill ( I have not tried, but may in the future). And a lot of the things her family did was very time intensive. However, she and her father would rather spend time doing things such as cleaning fish or gardening than in a job. There were also some less than idealized parts of the book. Her father (and presumably Dolly) would fish out of season, or take "justice" into their own hands. The book outlines her reality, and while I don't like these parts of her reality, I appreciate that she included it in her story. Later in her life, she wrote a forward to the book. She states that she regrets and does not condone much of the unscrupulous activity about which she wrote.
I recommend this book to anyone wanting to be more self-sufficient. It was enjoyable and inspirational, even if I found some ideas less than moral. I got this book from the library, but would actually like to add it to my home library at some point in time.
Thursday, April 24, 2014
Volunteer plants
Spring is here!! and with it comes so much joy and possibility.
We've been in our house for over a year, and last year in Spring we were surprised with lovely volunteer Peach Tree:

.JPG)
.JPG)
.JPG)
.JPG)
We've been in our house for over a year, and last year in Spring we were surprised with lovely volunteer Peach Tree:
Right now, it's beautiful.
So we get beauty in the Spring, and delicious sweet peaches later in the Summer. Last year, we were surprised by this sweet nutritious treat. This is why planting fruit trees is so much better than those silly ornamental trees. While ornamentals are beautiful in Spring, I can't add their fruits to my yogurt.
I have discovered other volunteers around our property, especially in my garden. I threw most of my kitchen scraps directly in my garden to feed the soil and the earthworms (this was a pre-chicken time in our life). This spring I got several wonderful surprises. The first being celery:
This really shocked me. I don't know if this is going to be edible, but I'm going to wait until it matures to find out.
I also found garlic growing in my garden. I can't wait to dig into this:
I also found some lose garlic bulbs starting to sprout in my compost pile. I decided to plant these composting bulbs. About 75% of the bulb wilted and died in the ground. The other 25% are taking off.
Taking into consideration that I paid nothing for any of this, and I thought this would be worm food, I am beyond thrilled. All this is so exciting and one of the reasons I love spring and all of the surprises and presents mother nature has for us.
Wednesday, April 23, 2014
Types of Cloth Diapers and Needed Supplies
Let's start off with the actual cloth diapers. We have experience with three types. There may be more, but since I have no experience, I have elected not to discuss them here.
1. Flat Diapers: These are the most tricky, and I wouldn't recommend them. They are one ply of material, much like a dish towel. You must fold them before using which is rather easy, but maybe an extra step that you might not want to take. On the plus side, they are excellent to use after your baby has grown out of them and they are the cheapest type of diaper. You will need Snappi's and a Diaper Cover (both discussed later).
.JPG)
2. Prefold Diapers: These are essentially flat diapers folded up and sewn together. They are only slightly more expensive than flats and infinitely easier. As your child grows, they will need larger sizes, but at less than $2 a prefold, it is affordable. They do have to be washed multiple times before you use them. If they are not washed before use, they will not absorb any of baby's outputs. These will also require Snappi's and Diaper Cover.

In order to prepare these diapers for wear, wash them on super hot with about 1/2 cup of your homemade laundry detergent. Continue to run them through the full cycles that include hot without soap. Once you run them through and there are no bubbles, they are probably ready to go. I have found this takes about 5 cycles. To test the diapers' readiness, dry the diaper and try to absorb water. If it absorbs, it's ready, if it does not, run it through a few more soap-less hot cycles.
3. All-in-One or Pocket Diapers: These are the easiest of all the diapers. Just as the name implies, this is the only thing you will need. My favorite for newborns to toddlers are Bum Genius. The are easy, and one one-size-fits-all adjustable diaper will last from when your child reaches 8 pounds to the time they are potty trained. Use the snaps on the front to make them smaller, and let the snaps out to make them larger. They adjust through 3 sizes. The inserts adjust as well (which I think is really cool!). The only real con of this diaper is they do not come in neat designs. They do, however, come in a wide array of colors. When you purchase these, please buy the snap version. The velcro version seems easier, but the baby can open them up and the velcro wears out rather quickly.
.JPG)

Right now, our son sits on the potty a lot of the time, but when we are out and about with him, we aren't quite ready to be diaper free. That's where Antsy-Pants come in. They are a pull-up diaper so he can step in and out of it, but he doesn't have to. If there is a big mess, we just unsnap and remove the diaper.

5. In order to successfully cloth diaper using Flats and prefolds, you need the aforementioned snappis,

6. and diaper covers.

Snappi's are a wonderful invention and they make cloth diapering a breeze. Use Snappi's in place of the old diaper pins. A snappi has three sides that have plastic teeth, and they come in a great range of colors. I recommend having at least 3. This will allow you to lose one, or have one break and you won't miss a day in your cloth diapering adventure.
Diaper covers hold everything together and hold the moisture in the diaper preventing leaks. They are made of PUL fabric, this means there is a water resistant covering on the inside of the fabric. This allows you to use the same diaper cover through the day as long as there are no blowouts. (as an aside, my husband and I considered a blow out whenever the mess went beyond the prefold and onto the inside of the diaper cover. A mess any bigger than that was a huge rarity.)
7. For wipes, you can use disposable but since you are already doing cloth diapers, using cloth wipes is really easy. You can purchase cloth wipes, but my husband and I made our own. We just cut up old tee-shirts. Our wipes were free. We just ran them under warm water, and away we went. We even used them when we were away from home. Most places have running water. When we were at a place that did not have running water, we just used disposable wipes. So far, we have used just over one pack of disposable wipes.

I like using the cloth wipes, since we are using only water to clean his hiney. We aren't adding any chemicals or cleaning agents to his skin that just sit there and fester. They seem to work better, as well.
We were able to custom fit the sizes of the wipes to his needs. When he was a newborn, we cut squares that were 4 inches by 4 inches. Now we are using wipes that are a square foot. We use old white tee-shirts for his hiney and different colored tee-shirts for other wiping needs such as wiping off hands and mouth after a meal.
8. We purchased two large wet bags, and one small wet bag for travel. The large ones are the size of a small kitchen trash bag and the small is about the size of a grocery store plastic bag. These wet bags are used to throw in your cloth until it is time to clean them. They are made from the PUL fabric just like the diaper covers. In fact, we have matching diaper covers and wet bags. Very neat!


We simply take the "at-home" wet bags, and secure them inside a hamper. When it's time to do a load of diapers, just empty out the wet bag into the washer and add the wet bag to the load. Easy as can be! If you forgot to pack the "on-the-go" wet bag, or you can't quite afford all the goodies for cloth diapering, use an old grocery bag. Yes, you will have to throw it after each use, but it's free, and still WAY better for the environment than using disposables.
9. An absolute necessity (although you can do cloth diapering without this, I would NOT want to!), is the diaper sprayer. This is for cleaning of poop from the diapers into the toilet. It is like the sprayer that is attached to your kitchen sink.
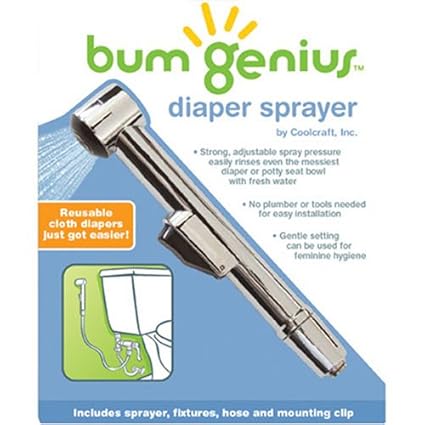
.JPG)
This may all seem overwhelming, but once you do it for a week, cloth diapering will be second nature.
I know you can buy a lot of these supplies used, but I have not done that, so I have no experience. I would have tried it, but I couldn't find a place to buy used.
For your convenience, I bought my prefolds, flats, snappis, covers and wet bags from Green Mountain Diapers. I bought my Bumgenius Diapers from Cotton Babies, his antsy pants from Antsy Pants. I have been satisfied will all of these interactions. Finally, his sprayer was purchased at a major chain baby store. Please note, I do not get any compensation from these companies, I just wanted to save you time in researching where to buy.
Please let me know if you have any questions, I would love to help you get started on your new adventure!
1. Flat Diapers: These are the most tricky, and I wouldn't recommend them. They are one ply of material, much like a dish towel. You must fold them before using which is rather easy, but maybe an extra step that you might not want to take. On the plus side, they are excellent to use after your baby has grown out of them and they are the cheapest type of diaper. You will need Snappi's and a Diaper Cover (both discussed later).
2. Prefold Diapers: These are essentially flat diapers folded up and sewn together. They are only slightly more expensive than flats and infinitely easier. As your child grows, they will need larger sizes, but at less than $2 a prefold, it is affordable. They do have to be washed multiple times before you use them. If they are not washed before use, they will not absorb any of baby's outputs. These will also require Snappi's and Diaper Cover.
In order to prepare these diapers for wear, wash them on super hot with about 1/2 cup of your homemade laundry detergent. Continue to run them through the full cycles that include hot without soap. Once you run them through and there are no bubbles, they are probably ready to go. I have found this takes about 5 cycles. To test the diapers' readiness, dry the diaper and try to absorb water. If it absorbs, it's ready, if it does not, run it through a few more soap-less hot cycles.
3. All-in-One or Pocket Diapers: These are the easiest of all the diapers. Just as the name implies, this is the only thing you will need. My favorite for newborns to toddlers are Bum Genius. The are easy, and one one-size-fits-all adjustable diaper will last from when your child reaches 8 pounds to the time they are potty trained. Use the snaps on the front to make them smaller, and let the snaps out to make them larger. They adjust through 3 sizes. The inserts adjust as well (which I think is really cool!). The only real con of this diaper is they do not come in neat designs. They do, however, come in a wide array of colors. When you purchase these, please buy the snap version. The velcro version seems easier, but the baby can open them up and the velcro wears out rather quickly.
Here is the inside of the cloth diaper with the insert pulled out:
5. In order to successfully cloth diaper using Flats and prefolds, you need the aforementioned snappis,
6. and diaper covers.
Snappi's are a wonderful invention and they make cloth diapering a breeze. Use Snappi's in place of the old diaper pins. A snappi has three sides that have plastic teeth, and they come in a great range of colors. I recommend having at least 3. This will allow you to lose one, or have one break and you won't miss a day in your cloth diapering adventure.
Diaper covers hold everything together and hold the moisture in the diaper preventing leaks. They are made of PUL fabric, this means there is a water resistant covering on the inside of the fabric. This allows you to use the same diaper cover through the day as long as there are no blowouts. (as an aside, my husband and I considered a blow out whenever the mess went beyond the prefold and onto the inside of the diaper cover. A mess any bigger than that was a huge rarity.)
7. For wipes, you can use disposable but since you are already doing cloth diapers, using cloth wipes is really easy. You can purchase cloth wipes, but my husband and I made our own. We just cut up old tee-shirts. Our wipes were free. We just ran them under warm water, and away we went. We even used them when we were away from home. Most places have running water. When we were at a place that did not have running water, we just used disposable wipes. So far, we have used just over one pack of disposable wipes.
I like using the cloth wipes, since we are using only water to clean his hiney. We aren't adding any chemicals or cleaning agents to his skin that just sit there and fester. They seem to work better, as well.
We were able to custom fit the sizes of the wipes to his needs. When he was a newborn, we cut squares that were 4 inches by 4 inches. Now we are using wipes that are a square foot. We use old white tee-shirts for his hiney and different colored tee-shirts for other wiping needs such as wiping off hands and mouth after a meal.
8. We purchased two large wet bags, and one small wet bag for travel. The large ones are the size of a small kitchen trash bag and the small is about the size of a grocery store plastic bag. These wet bags are used to throw in your cloth until it is time to clean them. They are made from the PUL fabric just like the diaper covers. In fact, we have matching diaper covers and wet bags. Very neat!
Our dinosaur wet bag in its place in the hamper and filled with dirty diapers:
We simply take the "at-home" wet bags, and secure them inside a hamper. When it's time to do a load of diapers, just empty out the wet bag into the washer and add the wet bag to the load. Easy as can be! If you forgot to pack the "on-the-go" wet bag, or you can't quite afford all the goodies for cloth diapering, use an old grocery bag. Yes, you will have to throw it after each use, but it's free, and still WAY better for the environment than using disposables.
9. An absolute necessity (although you can do cloth diapering without this, I would NOT want to!), is the diaper sprayer. This is for cleaning of poop from the diapers into the toilet. It is like the sprayer that is attached to your kitchen sink.
It is expensive at about $60, but it makes life so much easier.
10. Another step in making life easier is a bucket and chip clip for your toilet.
This is just an old kitty litter bucket with the bottom cut out. The chip clip hold your diaper in place. I will cover how to use this set up in the next post.
That covers all of the needed supplies for cloth diapering. The amounts needed vary depending on how often you plan on doing laundry. You will need to do laundry every 1 to 3 days. I would recommend at least two diaper covers in case one gets really yucky. (we had 5). The prefolds and flats come in six packs. We started with 12 prefolds in newborn, and 12 in the next size. We also had 7 pocket diapers, and we just added 3 antsy pants.
You don't need a special laundry detergent either. We use what we make. You can use anything that is dye and fragrance free such as Tide Free and Clear. DO NOT use Dreft. It is so full of chemicals and irritants such as fragrances.
This may all seem overwhelming, but once you do it for a week, cloth diapering will be second nature.
I know you can buy a lot of these supplies used, but I have not done that, so I have no experience. I would have tried it, but I couldn't find a place to buy used.
For your convenience, I bought my prefolds, flats, snappis, covers and wet bags from Green Mountain Diapers. I bought my Bumgenius Diapers from Cotton Babies, his antsy pants from Antsy Pants. I have been satisfied will all of these interactions. Finally, his sprayer was purchased at a major chain baby store. Please note, I do not get any compensation from these companies, I just wanted to save you time in researching where to buy.
Please let me know if you have any questions, I would love to help you get started on your new adventure!
Monday, April 21, 2014
Barnheart - A Book Review

As you can see from the lower left-hand corner of the book, I got Barnheart from the library. This is a wonderful memoir by a formerly local woman, Jenna Woginrich. In her previous, book she mentioned she went to Kutztown University and in this book, she reveals she grew up in Palmerton, PA.
The book starts with Jenna uprooting her homestead in Idaho and moving to Vermont to start over due to job loss. She moves into an old rental house with some acreage and starts to make her dream come true. Vermont holds a lot of challenges for a starting farmer including the harsh winter and urban folks who only want "pretty farms" as neighbors. Jenna ends up being forced from her rental property by her landlord when the landlord wants to reside in Jenna's current home. Jenna takes you through her journey of reestablishment. She rebuilds her farm twice throughout the span of the book.
The book is honest about her struggles. She is introspective and inspiring. When I was single, I dreamed of a homestead, but could never imagine accomplishing this without the help of a partner. She threw caution to the wind, and chased her dreams. She has more responsibility on her shoulders without a partner to lean on. Jenna shares her frustrations of being alone, but she has dream and won't let anything stand in her way.
Jenna goes from nothing, to a full garden, a flock of sheep, chickens, and bees all while learning some lessons about farming along the way.
This quick read (under 200 pages) lets you share in her adventure. I enjoyed reading about her passion for her lifestyle, although I did have to roll my eyes at the thought of Palmerton being suburban. Palmerton does have a downtown, but it is about as small town as it gets and I would consider rural. Palmerton is surrounded by farm and woods. But it made for good reading when she described her sister's horror at the thought of eating a turkey Jenna raised herself.
I would recommend this book for light, fun reading. It was an enjoyable read from someone who harbors the urge to homestead. You can follow Jenna on her blog where she has added to her farm.
Tuesday, April 15, 2014
Why We Cloth Diaper
When was pregnant, I spent a lot of time doing a lot of research and this lead me to come to a lot of conclusions. One of those conclusions is that I want to cloth diaper.
We decided to do this for the following reasons:
We decided to do this for the following reasons:
- It's healthier for the baby. The chemicals and substances in a disposable diaper is not good for baby's sensitive bottom. The disposable diapers are super absorbent. This is good in some regards as it will soak up all the baby's poop and pee. On the other hand, this will dry out the baby's skin and can lead to diaper rash.
- It is WAY cheaper. I have probably spent about $300 to $400 in purchasing cloth diapers and supplies. I have purchased all the diapers I need until my son is completely potty trained. I have heard estimates that using exclusively disposables would cost over $2,000. If you have a second child, you don't have to spend that much money for cloth again. If we have another child, we already have our diaper stash. If we change him more, it costs us no more.
- Your child is more aware of wetness. You have to change him more often, as no one likes to sit in their own filth. That can be a pro or con depending on your point of view. For us, we consider it a pro, while it's more work, I feel it is healthier. It is also easier to potty train as they are more aware of their wet diaper (our son is mostly potty trained at less than two-years old!). Admittedly, once Jaxson turned 18 months, we have started to put him in disposables at night. We think the wetness caused him to wake up. So using both disposable and cloth is a viable option.
- Cloth diapers are way cuter than plain ole disposables. They come in different colors and designs.
- Better for the environment. We buy them once, and we re-use. Our footprint is much less. And since we are the parents, we are saving this planet for those sweet little hineys we are diapering.
- If you use prefolds or flats (I will cover this in my next post), you can re-use them as rags. I know my husband's parents have uses his old diapers for years. In fact when we got our first batch of prefolds, he laughed because he thought those were rags for washing cars. He never knew they were his old diapers.
- They are great at keeping leaks at bay. Yes, we have had some leaks, but none like I have heard of from other parents. We have had little bit of poo that got on his leg, or just on the outside of the diaper, but that has been rare. We have never had a blow out that resulted in a mess covering more than just a spot. This is hard to believe, but it is true. These diapers just work better. We used disposable diapers on a trip we took to Florida. We were amazed at how much better our cloth ones work.
 |
| Fun cloth diapers! |
Monday, April 14, 2014
Simple Smoothie Recipe
Smoothies are a great way to get in your veggies, pro-biotics and minerals. They are yummy, easy and even kids like them (well, mine does anyway).
Some basics for a smoothie are:
A blender: I have a cheapo one. I regret buying the cheapo one, and wish I would have purchased one that was a bit more sturdy, but it works.
.JPG)
Some greens: This is an easy way to add greens to your diet. You don't taste them, but they still pack a great nutritional wallop. I use the really nutrient dense ones, such as kale or spinach. You can use a lot. I add 2 handfuls.

Frozen berries: maybe a cup. This replaces any ice cubes you may otherwise have used and adds antioxidants and yumminess.
.JPG)
A dairy base: milk, kefir, Homemade Yogurt. Some folks enjoy using almond or coconut milk. That works as well, but I usually use milk and yogurt. These ingredients are cheap, plentiful and local. I used milk and yogurt, but use what makes you happiest.
Banana: I use one banana to give my smoothie a creamy consistency and sweetness. I probably could have gone without this, as the yogurt already gives the drink a nice texture.

Finally, I add one tablespoon of black strap molasses. This stuff packs a mineral punch, adds sweetness and a deeper flavor. The molasses has calcium, iron and other trace minerals.

Now, blend it, pour,

and ENJOY!

Some basics for a smoothie are:
A blender: I have a cheapo one. I regret buying the cheapo one, and wish I would have purchased one that was a bit more sturdy, but it works.
Some greens: This is an easy way to add greens to your diet. You don't taste them, but they still pack a great nutritional wallop. I use the really nutrient dense ones, such as kale or spinach. You can use a lot. I add 2 handfuls.
Frozen berries: maybe a cup. This replaces any ice cubes you may otherwise have used and adds antioxidants and yumminess.
A dairy base: milk, kefir, Homemade Yogurt. Some folks enjoy using almond or coconut milk. That works as well, but I usually use milk and yogurt. These ingredients are cheap, plentiful and local. I used milk and yogurt, but use what makes you happiest.
Banana: I use one banana to give my smoothie a creamy consistency and sweetness. I probably could have gone without this, as the yogurt already gives the drink a nice texture.
Finally, I add one tablespoon of black strap molasses. This stuff packs a mineral punch, adds sweetness and a deeper flavor. The molasses has calcium, iron and other trace minerals.
Now, blend it, pour,
and ENJOY!
This is a base that can be changed. Remove the berries, the banana and molasses and add frozen peaches, vanilla, cinnamon and maple syrup. This is a great healthy treat that you can have as a snack or meal. YUM!!
Thursday, April 10, 2014
Carrots Love Tomatoes - A book review
Several years ago, when I began my backyard garden, I bought myself Carrots Love Tomatoes.

This book outlines which veggies (and sometimes fruit) to plant together. This is called companion planting. The idea is that different types of plants in close proximity can benefit each other. For example, planting your carrots near onions and leeks is beneficial for the carrots since the onions and leeks act as a repellent to the carrot fly.
A gardener can also gain a higher yield per acre by integrating plantings instead of abiding to a mono-cultural method (i.e. rows and rows of carrots, followed by rows and rows of beets). Planting rows which contain a kohlrabi - beet - kohlrabi pattern benefits both crops. They both do best in the same type of soil and pull their nutrients from different levels. Anytime you diversify your crops, you make it harder for critters to take out your entire patch.
If there is a worm that just loves cucumbers, he and his buddies can easily demolish one plant, but if the next plant is a distance away from the one he destroyed, he must figure out how to get over to the new cucumber plant. Chances are he won't make it the entire way, and your other plant is safe. Or you have time to take protective measures. But if all of your cucumber plants are close and hanging out together, it will be that much harder to save your plants.
The book also discusses which plants are detrimental to each other. As well as the different ways to cope with certain diseases and pests and basic descriptions of each plant. While this book is not exhaustive (and therefore NOT overwhelming), the array of plants it covers varies from vegetable and herbs to nuts and wild plants. There are also chapters on gardening techniques, garden plans and pest control.
This book is a wonderful resource that I have by my side when I'm planning my garden. Although of this information is easily accessible via the internet, having a small, easy to read book (that won't break if it get's wet or dirty) by your side makes life a lot easier. I would recommend this book and have used it often and will continue to use it over the years.
Wednesday, April 9, 2014
Beautiful Shelf (for FREE!)
My husband is quite the talented fellow. I talked earlier about how he built our chicken coop for under $50 using re-purposed materials. Well, now he's at it AGAIN. He used those same scraps from the local soda company.

.JPG)
.JPG)
The corners of these are held together with brackets, so he took his table saw to cut them out. The remaining pieces are the boards he used to make my shelf.
He did his magic, like he does and produced this beautiful and rustic shelf.
The details from how it went from boards to the shelf is a little fuzzy for me. Perhaps, if we get enough interest, I can get my talented husband to be a guest blogger and describe how he did this.
We decided not to sand or paint anything. We really like the rustic look this shelf has. But if you prefer a more finished look, you can always sand and paint as desired.
Tuesday, April 8, 2014
Winter Happenings and Spring Awakening
This winter was long, cold and snowy. I am so relieved to be at the other end enjoying Spring and all of Spring's possibilities. The growing season, the building season, the play outside, eat outside season. This season fills me with hope and happiness.
This winter was hard on the surrounding wildlife. Towards the end, we saw deer in our backyard every evening. Some nights we would count up to ten deer. At first it was neat, but then they started to eat our freshly planted trees, and rip up the yard. They must have been getting very hungry and desperate. Overall, it was very neat, and now we have huge cages around the trees. There were so many deer, that when you visit our backyard, you must be careful where you step.

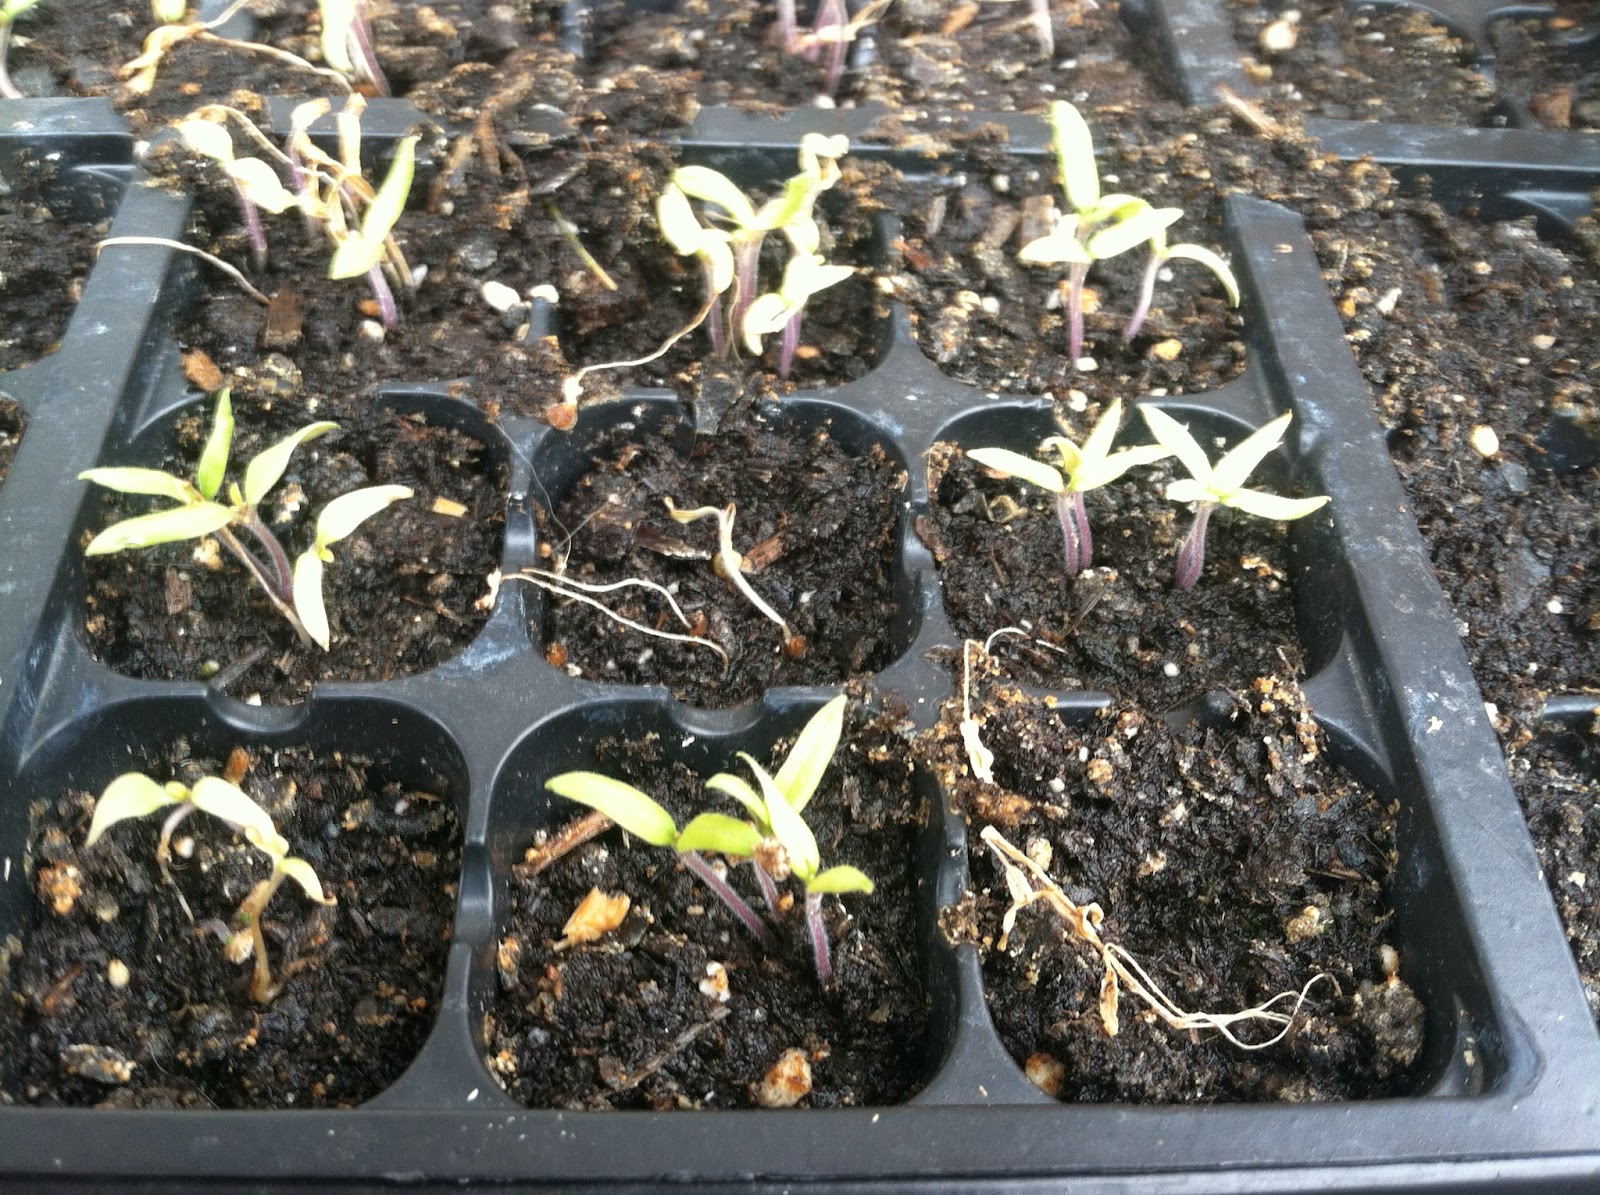
A few weeks ago, I started my tomato seeds and brussel sprouts. I was very excited to see how the tomato seeds germinated, since these were the seed I'd saved previously (Saving tomato seeds).
They did very well. They germinated better than the store bought seeds. Unfortunately, I didn't have any grow lights set up, so my tomatoes are limping along right now, but suspect I'll have nice amount of started tomato plants for myself, just not enough to share like I usually do.
I also started stevia and mint. I know mint is quite a prolific plant once it is started, but it is a bit of a challenge to start it. Both of these seed are very fine, and need to only go on the surface of moist soil. The germination rate seems to be low, but I am very excited to have my very own stevia plant.
At the end of March I planted my cold weather vegetables. I have peas, carrots, beets, spinach and onions all in the ground. The spinach is starting to show some green leaves. In a few weeks, I will no longer be paying $6 for a pound of organic spinach at the grocery store.
My chickens are doing well (most of them). They are all laying. We are now getting brown, blue and small white eggs. And we are getting enough to give some away! It's all very eggs-citing. (Geez! sorry about that one, I couldn't help myself!)
.JPG)
As I alluded to earlier, Most of my chickens are doing well. One is no longer with us. Beatrice, our White Sultan, was killed. We aren't sure what happened to her. I think she may have been attacked by the other chickens. While it is sad, this is what happens when you have any animals.
So slowly but surely, our piece of land is coming alive. The grass is greener and the chickens are happier. All is well.
This winter was hard on the surrounding wildlife. Towards the end, we saw deer in our backyard every evening. Some nights we would count up to ten deer. At first it was neat, but then they started to eat our freshly planted trees, and rip up the yard. They must have been getting very hungry and desperate. Overall, it was very neat, and now we have huge cages around the trees. There were so many deer, that when you visit our backyard, you must be careful where you step.
A few weeks ago, I started my tomato seeds and brussel sprouts. I was very excited to see how the tomato seeds germinated, since these were the seed I'd saved previously (Saving tomato seeds).
They did very well. They germinated better than the store bought seeds. Unfortunately, I didn't have any grow lights set up, so my tomatoes are limping along right now, but suspect I'll have nice amount of started tomato plants for myself, just not enough to share like I usually do.
I also started stevia and mint. I know mint is quite a prolific plant once it is started, but it is a bit of a challenge to start it. Both of these seed are very fine, and need to only go on the surface of moist soil. The germination rate seems to be low, but I am very excited to have my very own stevia plant.
At the end of March I planted my cold weather vegetables. I have peas, carrots, beets, spinach and onions all in the ground. The spinach is starting to show some green leaves. In a few weeks, I will no longer be paying $6 for a pound of organic spinach at the grocery store.
My chickens are doing well (most of them). They are all laying. We are now getting brown, blue and small white eggs. And we are getting enough to give some away! It's all very eggs-citing. (Geez! sorry about that one, I couldn't help myself!)
As I alluded to earlier, Most of my chickens are doing well. One is no longer with us. Beatrice, our White Sultan, was killed. We aren't sure what happened to her. I think she may have been attacked by the other chickens. While it is sad, this is what happens when you have any animals.
So slowly but surely, our piece of land is coming alive. The grass is greener and the chickens are happier. All is well.
Subscribe to:
Posts (Atom)