Monday, October 21, 2013

Goodnight Fig Tree

I bought a fig tree in the beginning of Spring.  It is a special kind of fig tree.  This fig tree is call a Chicago Hardy.  I assumed, due to the name, that this typically warm weather tree would thrive in the zone 6 climate that I live in.  And it did during the summer.  It got leaves and even had a shoot coming off the bottom.  (as an aside, I'm trying to root it, but no luck so far)


I even got some fruit from the tree.  They are a little green because I picked them early.  I was too excited to wait for them to brown up.

They were yummy.  Barely any of us, aside from Jaxy, had any.  Jaxy and I would walk out in the morning to let the chickens out of the coop for the day, stop and check the fig tree on the way and he would eat any ripe figs in the flash of an eye.  We got about 10 figs the entire summer, which is awesome for a fruit tree's first year.

Anyway, I had to put the Fig Tree to sleep for the winter.  There are two main ways to do this.

First is the Trench method.  With this method, you dig a trench next to the tree, dig up half the tree's roots and knock the tree into the trench and cover it with dirt.  I decided not to do this method since it seemed like this may be hard on the roots.  I selected the second method.

In this method, you insulate the tree with dry organic matter.  Some use straw, some use leaves.  It's important that it's dry so that you don't end up composting your tree.  This method is simple and a lot less labor intensive.  

First, I wrapped fencing around the tree.  I was around the drip edge of the tree, so fairly wide.


Then, I filled the fencing with fluffy straw.  Easy as could be!


And now our fig tree is put to rest after an exciting first season on our patch.  I hope it has a restful off-season.


Friday, October 18, 2013

Day Old Chicks

Right now, we have 5 chickens that were born in the beginning of June.  So they are just under 5 months old.  we have three Easter Eggers, a Silver Laced Wyandotte and a Jersey Giant.  The Jersey Giant is my favorite, so I named her Betty.  The others remain nameless in case we have to eat them.

They are still not producing eggs, but when they do we probably will not be getting enough eggs.  So we decided to beef up our stock.  We received them two days ago.  We ordered 2 Dominiques, 2 Jersey Giants, 2 Fayoumis and one White Sultan.  The White Sultan is really good at nothing except for looking pretty.  So that is our chicken that is strictly a pet.

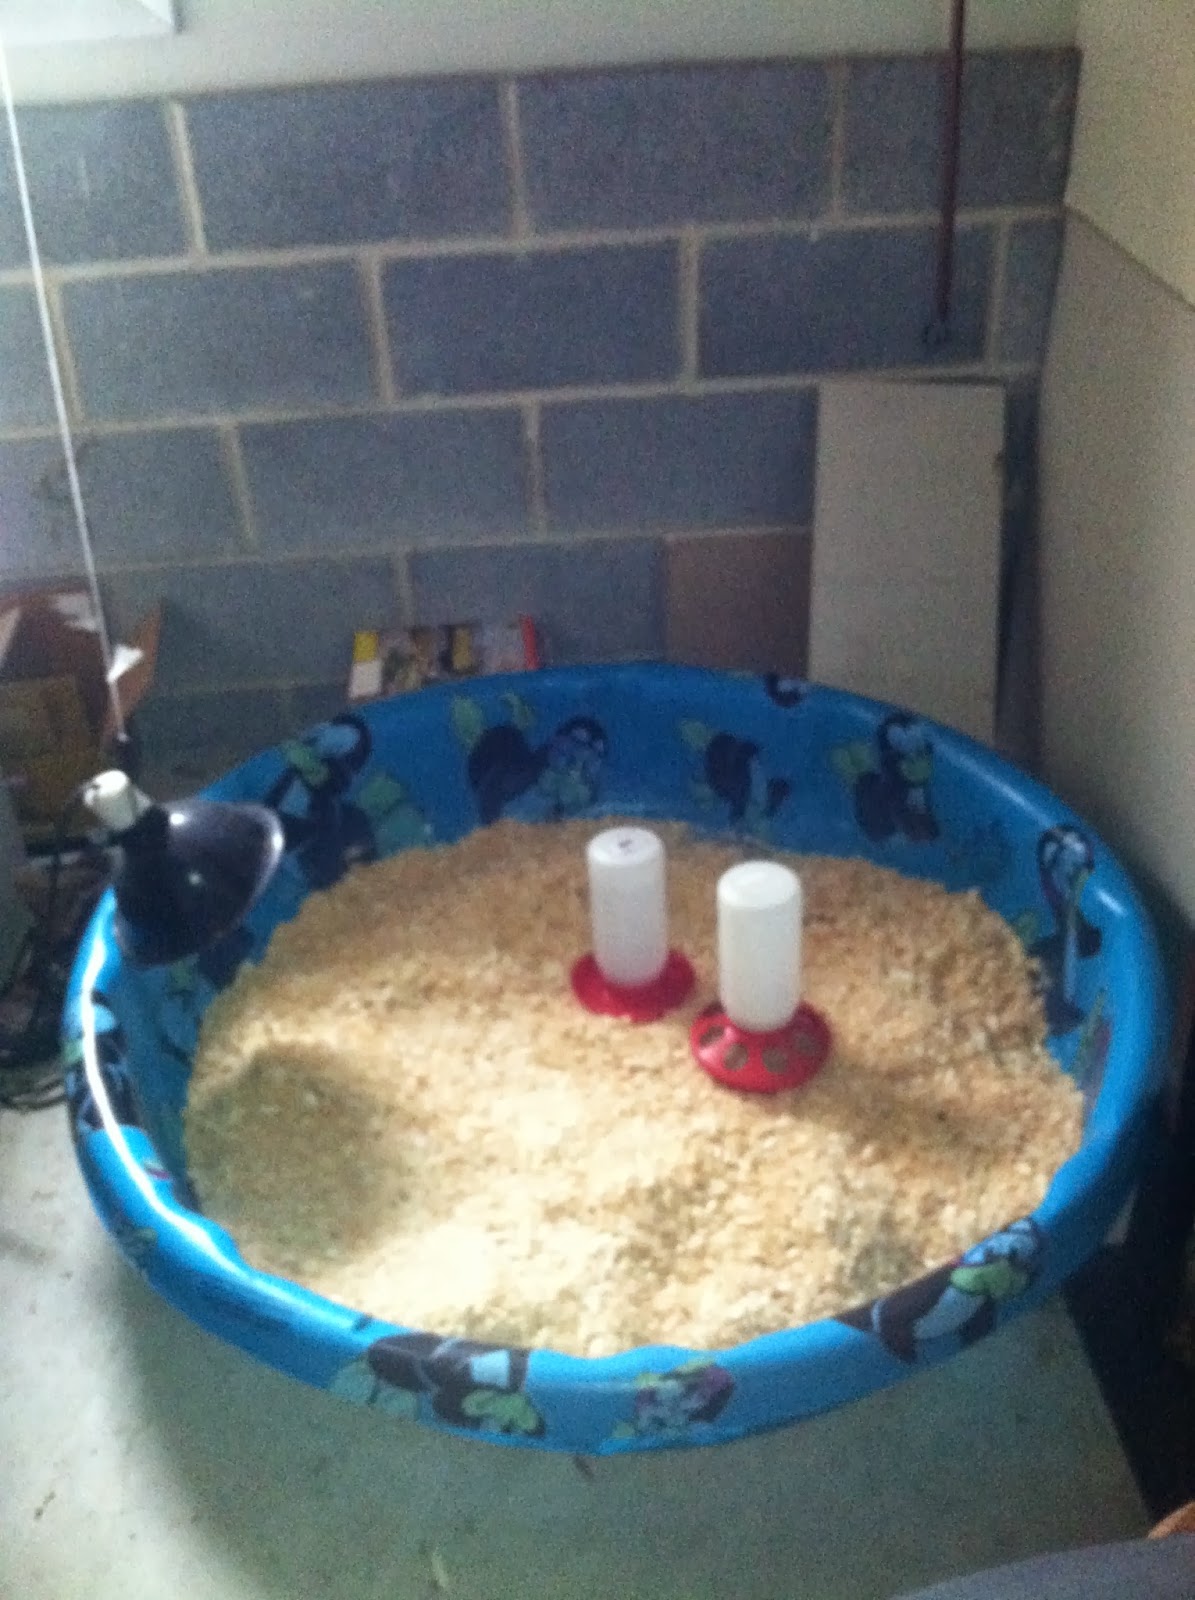
The first thing we did was set up their brooder. This is the place they are going to live for the next 5 weeks or more, depending on weather.  The brooder is an old wading pool I found in the garbage.  The wading pool is especially good because is has no corners for them to get piled up in.  We hung a heat lamp from the ceiling.  My husband used to have many snakes (yuck - we still have one), this is one of his left over heat lamps. And a feeder and a waterer we bought from Tractor Supply.  I had everything left over from the last time I set up the brooder.


I picked the girls up from the Post Office, and brought them straight home.  Upon opening the box they came in, we saw one of our chicks has died.  These things happen when you have living things, but it is never fun.  We think it was one of the Dominiques.

I took them out of the box, one by one, dipped their beak in their water, and let them enjoy their new surroundings.  At first they all huddled under the heat lamp to warm up from their cool flight.

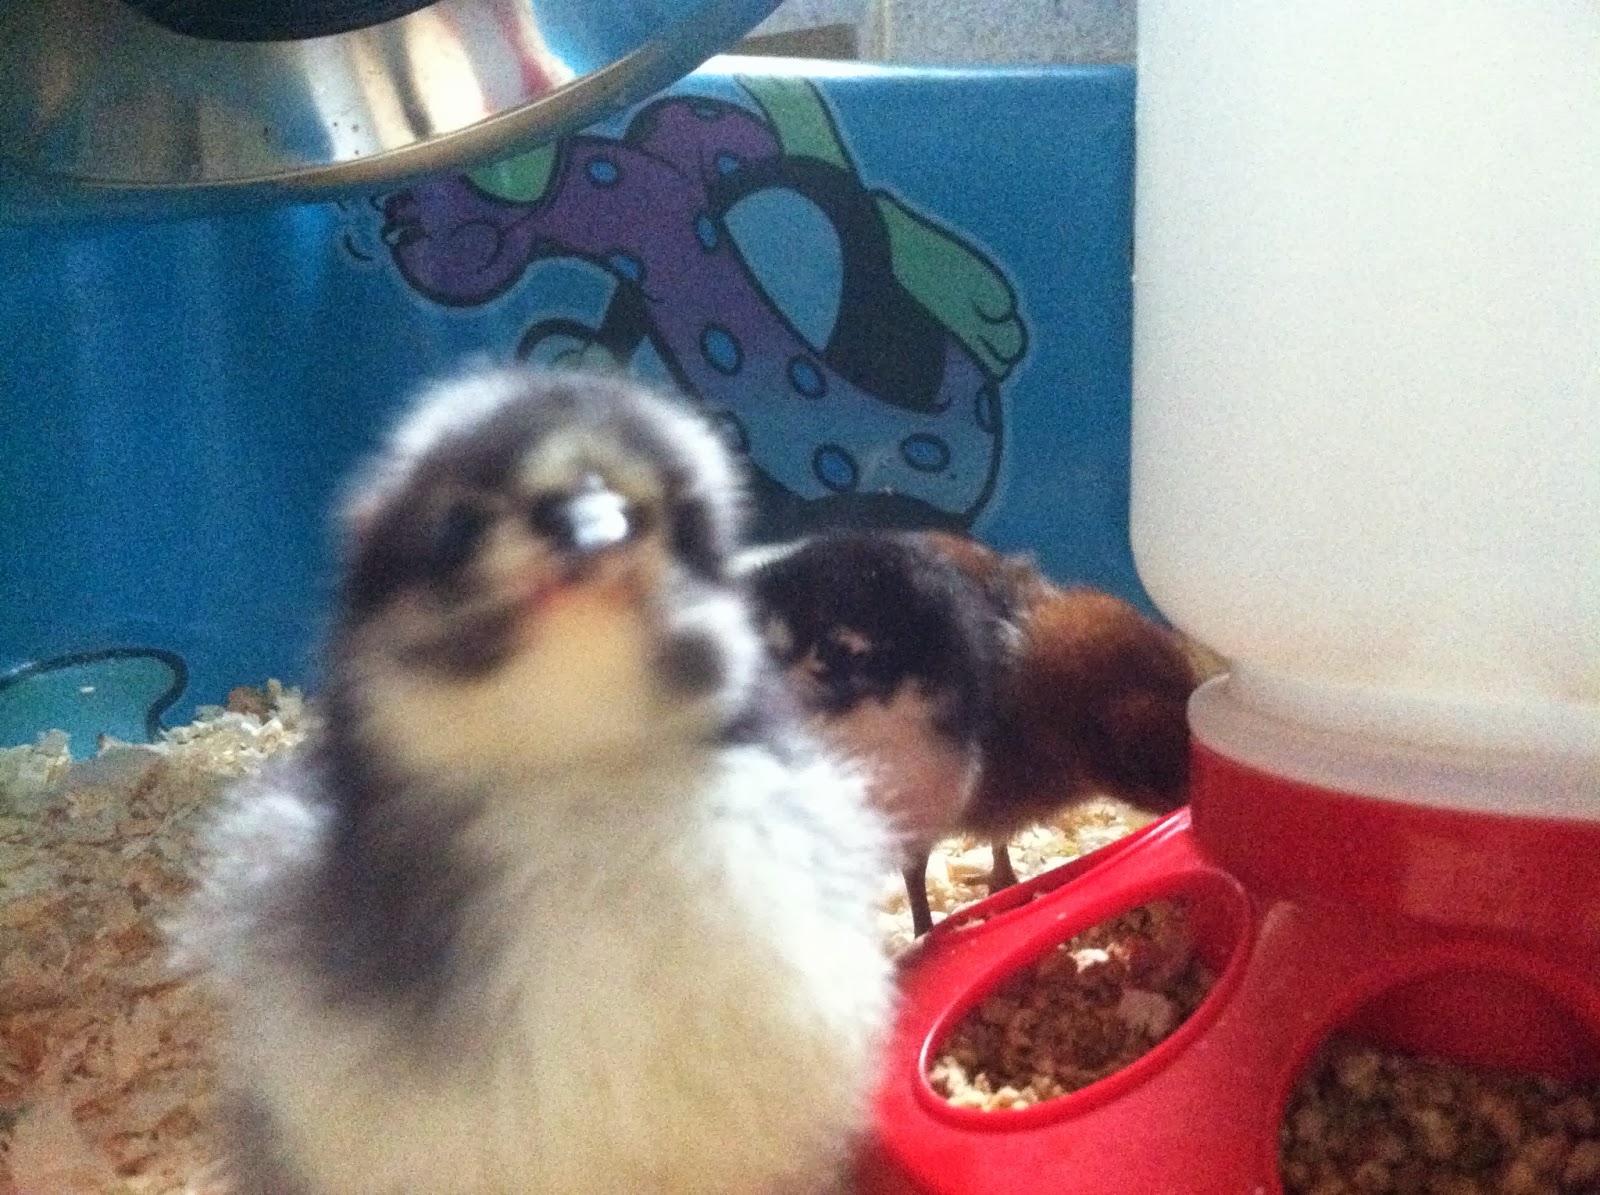
Then they start to spread out, get something to eat and started to explore. The Dominque is eating while one of the Fayoumi's looks on from the right, and the Jersey Giant hangs out on her left.


We added some water to their food.  At this point in their lives, remaining hydrated is very important.  I'm going to have to clean the whole food dispenser out in a few days to prevent any mold growth.

The Fayoumi is a little camera shy.  You can see that they have brown fluff with leopard spots.


My Dominique is quite the camera hog.  Or maybe just curious.  Whenever I put my camera down to take their picture she came running up front and center.  


The White Sultan which I have yet to name, was camera shy.  I picked her up so I could show her off.  I read they were originally in gardens as an ornamental touch.  So she is my walking flower.  You can see the feathers on her feet already!

This morning, Jaxy came downstairs to hang out with the babies.  He loves them!  Also, you can see in the lower right corner, I added some grit, just some small gravel in the top of an old lid.


Monday, October 14, 2013

Saving Tomato Seeds

I decided to save my tomato seeds from the garden.  This is not as easy to do as the bean seed saving, but it's still easy enough.

First I selected a tomato:


What a pretty tomato.  I will miss tomatoes from my garden, 

After I selected the tomato, I cut it in half so that you have a top half and a bottom half.  This makes it easier to get the seeds out.


You are now ready to get those lovely seeds out.  I squeezed them into a glass jar.  


Once I squeezed the seeds from both halves the bottom of the jar looked like this:


I still had two yummy tomato halves to eat.  They were great.  No seeds either.


I added water to the jar.  This helps the seeds separate from the gook (in technical terms) from the seeds.


The cover the jar with cheese cloth and a rubber band, and let it sit on the window sill for a few days.  I agitated the water every so often.  I don't know if you need to, but I did.  


After a few days, you will see the seeds separating.  At that point, I drained out the liquid into the sink.  


Here's where we run out of pictures.  I took the rubber band and the cheesecloth off of the jar and dried it on a colander for a few days.  The key is to get your seeds dry before you store them.  Make sure your seeds are nice and dry and store them in an envelope to use next year.  Make sure you label it, unless you like surprises.  Oh the fun of seed saving.  So next year's sauce and salsa will come from tomatoes from my garden grown from seeds that were saved by me.  That is the ultimate in awesome!!


Friday, October 4, 2013

Wash Line Paint Job

My husband constructed a wash line for me.  He told me I could paint it, and use any color I desired.  I love bright bold colors.  When I first bought a house, I painted my living room Barney The Purple Dinosaur purple.  When my husband moved in, we painted is orange with dark blue highlights.  It looked amazing.

The house we live in now has white walls, but I'm not ready for that project.  I have so many other projects that take priority.  (some of which you'll be reading about on here)

So I decided to pick many different pretty colors.  I painted the whole thing with a white outdoor  paint.  It looked, um...  ...well, it looked lame.  I have no pictures of the before or during, so you'll have to take my word for it.

I then used my selected colors, orange, pink, green and yellow (all which could be proceeded with the word "neon").  and painted large polka dots around the poles.  The tops I painted with slanted stripes. One top I painted with pink, and one with green.  The colors were sample indoor paints.  They were only $2.50 for a half pint.  After all that I sealed it with outdoor paint.

It looks as though Dr. Suess visited our house, and I love it!


So for $20 and 3 hours, I got a little piece of happiness every time I'm doing one of my chores.

Wednesday, October 2, 2013

Saving Seeds: Beans

Saving seeds is a great way to be even more economical in your garden.  Every time you are able to provide something for yourself and therefore not purchase a product, you are closer to closer to self-sufficiency.  It's better for the planet, and it is just neat to watch the way the natural world works.

Today, I'm going to talk about saving some seeds from Dragon Tongue Beans. They were fairly tasty, and looked rather awesome when they were growing. They were purple speckled.

At the end of the bean season, I left a few beans on the vine to dry out naturally.  The area isn't the prettiest, but to me it looks like more nourishment for next year.

The unpretty patch of beans:


I pick the pods from the patch:


This is an individual pod, so you can see what it looks like all dried out:


Now, I simply split the pod open.  Please excuse the dirt under my nails as I was out in the garden playing):


These were the fruits (perhaps beans?) of that single pod of labor:


Here were the beans from the rest of my labor (I love the pretty color purple!):


There were some brown beans in the pods.  I removed those, as I thought they didn't look very fertile.  But what do I know.  I may be wrong on this one.  I may also be right.  I have no brown beans.  Experiment and see what works:


I stored the dried beans in an old glass baby food container and will plant them next year.  This task was easy, and relatively quick and really fun.  I will continue to save seeds as the sense of personal satisfaction is HUGE.