This winter was long, cold and snowy. I am so relieved to be at the other end enjoying Spring and all of Spring's possibilities. The growing season, the building season, the play outside, eat outside season. This season fills me with hope and happiness.
This winter was hard on the surrounding wildlife. Towards the end, we saw deer in our backyard every evening. Some nights we would count up to ten deer. At first it was neat, but then they started to eat our freshly planted trees, and rip up the yard. They must have been getting very hungry and desperate. Overall, it was very neat, and now we have huge cages around the trees. There were so many deer, that when you visit our backyard, you must be careful where you step.
A few weeks ago, I started my tomato seeds and brussel sprouts. I was very excited to see how the tomato seeds germinated, since these were the seed I'd saved previously (Saving tomato seeds).
They did very well. They germinated better than the store bought seeds. Unfortunately, I didn't have any grow lights set up, so my tomatoes are limping along right now, but suspect I'll have nice amount of started tomato plants for myself, just not enough to share like I usually do.
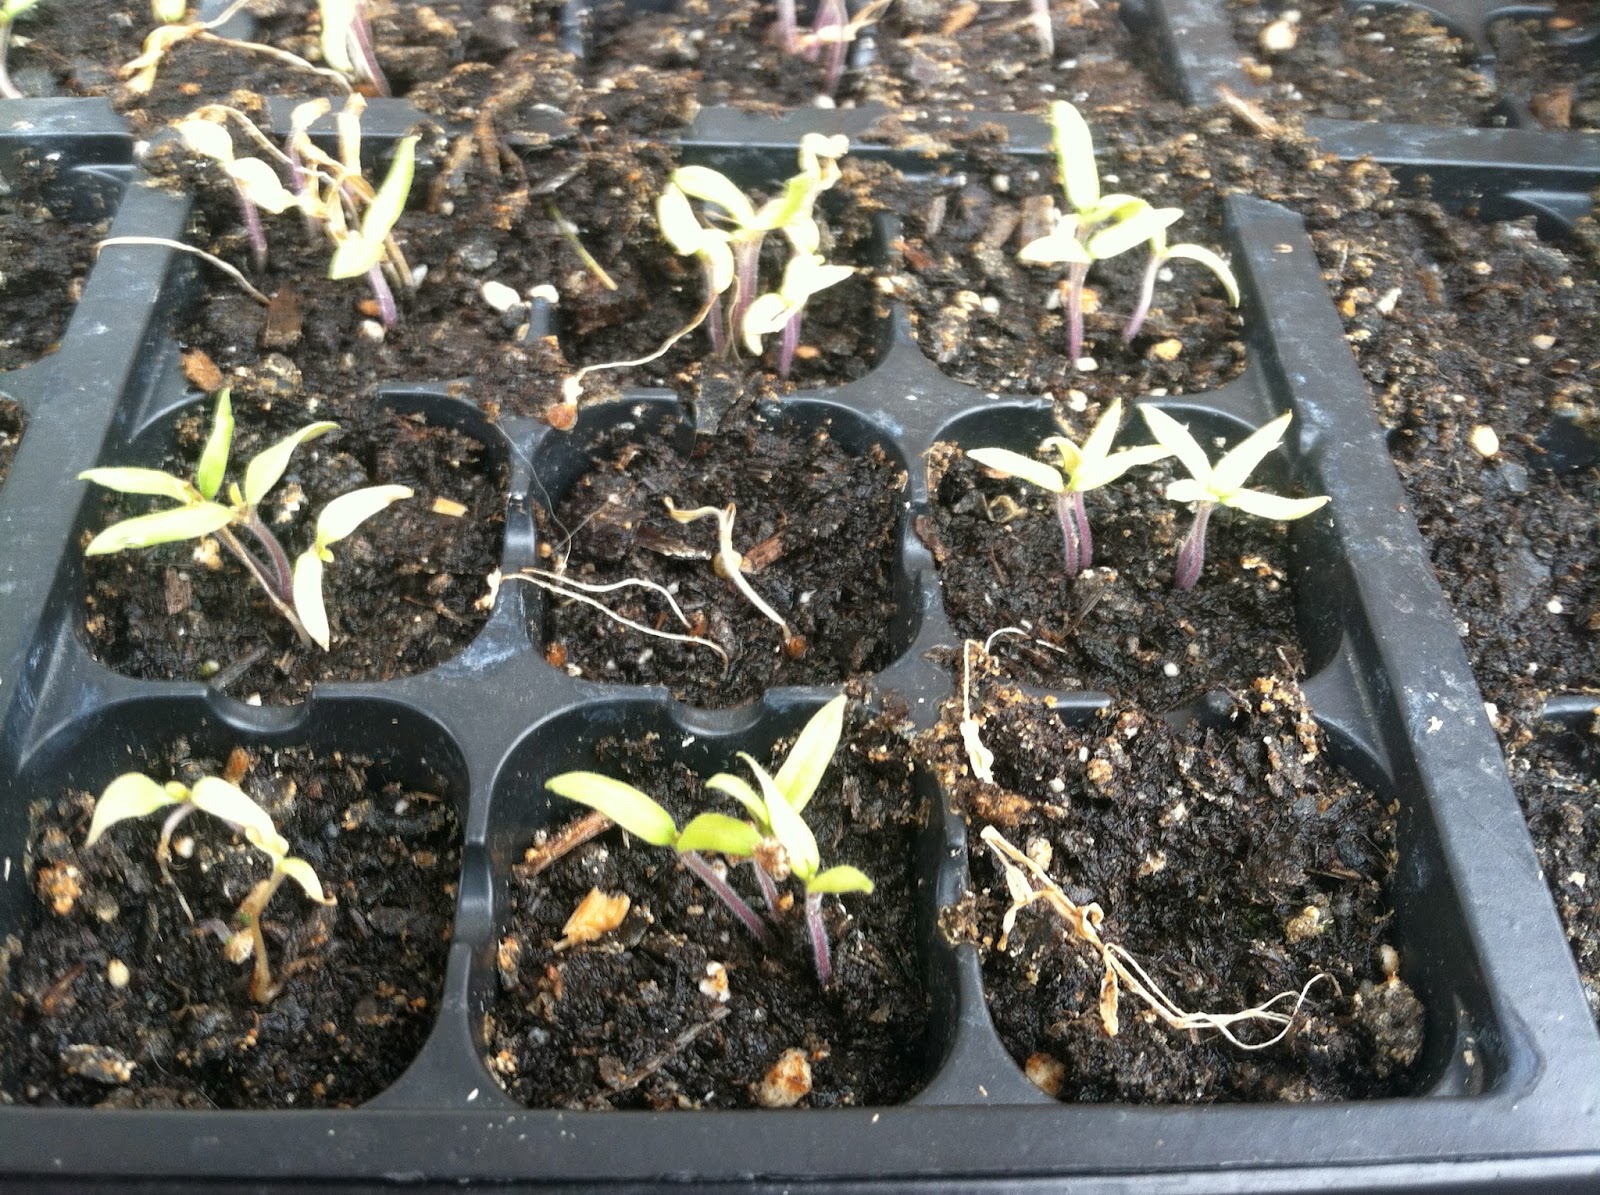
I also started stevia and mint. I know mint is quite a prolific plant once it is started, but it is a bit of a challenge to start it. Both of these seed are very fine, and need to only go on the surface of moist soil. The germination rate seems to be low, but I am very excited to have my very own stevia plant.
At the end of March I planted my cold weather vegetables. I have peas, carrots, beets, spinach and onions all in the ground. The spinach is starting to show some green leaves. In a few weeks, I will no longer be paying $6 for a pound of organic spinach at the grocery store.
My chickens are doing well (most of them). They are all laying. We are now getting brown, blue and small white eggs. And we are getting enough to give some away! It's all very eggs-citing. (Geez! sorry about that one, I couldn't help myself!)
As I alluded to earlier, Most of my chickens are doing well. One is no longer with us. Beatrice, our White Sultan, was killed. We aren't sure what happened to her. I think she may have been attacked by the other chickens. While it is sad, this is what happens when you have any animals.
So slowly but surely, our piece of land is coming alive. The grass is greener and the chickens are happier. All is well.
A blog about homesteading and trying to live more simply. Trying to do more projects on my own in order to become more self-reliant. For the fun of it. Lots of pictures. By Julia Franke. Simplicity for Julia
Showing posts with label Seed Saving. Show all posts
Tuesday, April 8, 2014
Monday, October 14, 2013
Saving Tomato Seeds
I decided to save my tomato seeds from the garden. This is not as easy to do as the bean seed saving, but it's still easy enough.
First I selected a tomato:
What a pretty tomato. I will miss tomatoes from my garden,
After I selected the tomato, I cut it in half so that you have a top half and a bottom half. This makes it easier to get the seeds out.
You are now ready to get those lovely seeds out. I squeezed them into a glass jar.
Once I squeezed the seeds from both halves the bottom of the jar looked like this:
I still had two yummy tomato halves to eat. They were great. No seeds either.
I added water to the jar. This helps the seeds separate from the gook (in technical terms) from the seeds.
The cover the jar with cheese cloth and a rubber band, and let it sit on the window sill for a few days. I agitated the water every so often. I don't know if you need to, but I did.
After a few days, you will see the seeds separating. At that point, I drained out the liquid into the sink.
Here's where we run out of pictures. I took the rubber band and the cheesecloth off of the jar and dried it on a colander for a few days. The key is to get your seeds dry before you store them. Make sure your seeds are nice and dry and store them in an envelope to use next year. Make sure you label it, unless you like surprises. Oh the fun of seed saving. So next year's sauce and salsa will come from tomatoes from my garden grown from seeds that were saved by me. That is the ultimate in awesome!!
Wednesday, October 2, 2013
Saving Seeds: Beans
Saving seeds is a great way to be even more economical in your garden. Every time you are able to provide something for yourself and therefore not purchase a product, you are closer to closer to self-sufficiency. It's better for the planet, and it is just neat to watch the way the natural world works.
Today, I'm going to talk about saving some seeds from Dragon Tongue Beans. They were fairly tasty, and looked rather awesome when they were growing. They were purple speckled.
At the end of the bean season, I left a few beans on the vine to dry out naturally. The area isn't the prettiest, but to me it looks like more nourishment for next year.
The unpretty patch of beans:
I pick the pods from the patch:
This is an individual pod, so you can see what it looks like all dried out:
Now, I simply split the pod open. Please excuse the dirt under my nails as I was out in the garden playing):
These were the fruits (perhaps beans?) of that single pod of labor:
Here were the beans from the rest of my labor (I love the pretty color purple!):
There were some brown beans in the pods. I removed those, as I thought they didn't look very fertile. But what do I know. I may be wrong on this one. I may also be right. I have no brown beans. Experiment and see what works:
I stored the dried beans in an old glass baby food container and will plant them next year. This task was easy, and relatively quick and really fun. I will continue to save seeds as the sense of personal satisfaction is HUGE.
Subscribe to:
Posts (Atom)